Few monuments reward a camera the way the Taj Mahal does. Its perfect symmetry, glowing white marble, long reflecting pool and finely worked details give you something new to frame at almost every step, and the light changes how it looks from hour to hour. The challenge for first-time visitors is knowing where to point the lens beyond the same straight-on shot everyone takes. These Taj Mahal photography tips focus on what you can actually do on the day: choosing a camera or phone, using composition, trying different angles, handling bright marble and working around crowds. You don’t need professional gear, just a few deliberate habits.
Why the Taj Mahal Is So Good for Photography
The Taj Mahal is photogenic by design, which gives you a lot to work with:
- Perfect symmetry: Both halves mirror each other, so balanced compositions come naturally.
- White marble: It picks up the colour of the sky, so the same view can look cool, neutral or warm.
- Repeating patterns: Arches, panels and windows create rhythm you can frame.
- Domes and minarets: Strong vertical shapes against open sky.
- Reflecting pool and charbagh gardens: Leading lines, reflections and foregrounds.
- Decorative inlay work: Fine detail that rewards a closer look.
Because the monument changes with the light, one visit can give you very different pictures. Travelers who want more flexibility during their Agra visit may prefer a private Taj Mahal Tour By Luxury Car, which can make it easier to include additional photography stops around the monument.
The Best Camera for Taj Mahal Photography
You don’t need professional equipment. Most visitors get excellent Taj Mahal pictures with a phone, and a camera kit simply adds options.
Smartphone
Modern phone cameras handle this subject well if you use a few features on purpose:
- HDR: Balances bright marble against darker shadows.
- Wide-angle mode: Fits the whole monument and foreground into one frame.
- Portrait mode: Better for people than for the monument, where it can blur edges oddly.
- Gridlines: Keep the horizon and minarets straight.
- Exposure adjustment: Slide down slightly if the marble looks washed out.
- Clean lens: Wipe it first. Pocket smudges soften every shot.
DSLR or Mirrorless Camera
With an interchangeable-lens camera, keep the setup simple:
- Wide-angle lens: Roughly 16–35mm (full-frame equivalent) for gardens, pathways and the full monument.
- Standard zoom: A 24–70mm lens covers most situations if you only carry one.
- Telephoto lens: A 70–200mm helps with dome details, carved marble and distant views.
- Spare battery and extra memory card: You’ll shoot more than you expect.
Use Symmetry to Create Strong Taj Mahal Photos
This is the single most useful idea for first-time visitors.
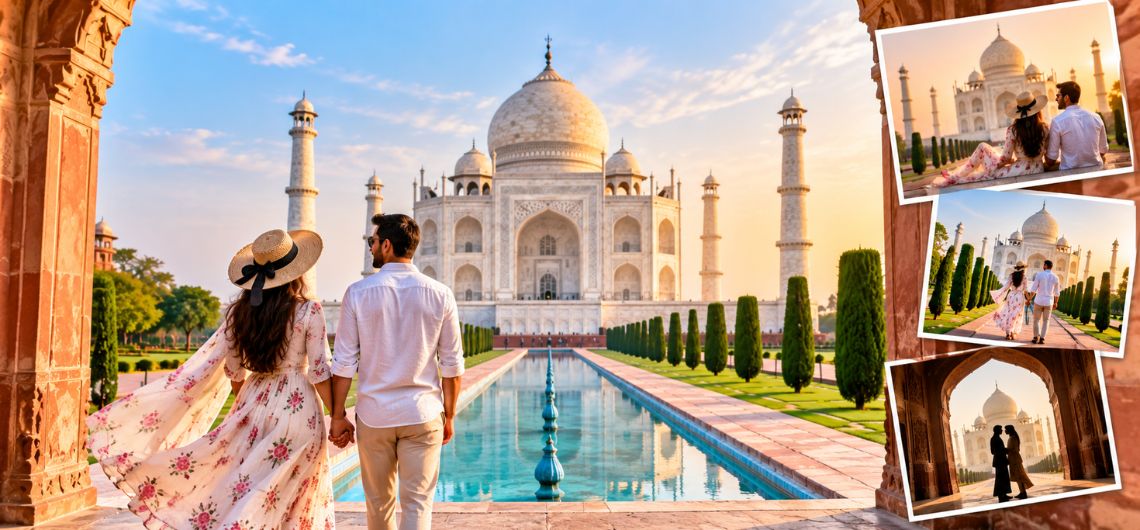
Why symmetry works here. The whole complex is laid out along a central line. When you stand on that line and place the monument in the middle of the frame, the two halves balance and the viewer’s eye settles on the dome. A small shift off-centre can look like a mistake, because the structure itself is so evenly balanced.
How to do it well:
- Centre the monument. Line up the dome with the middle of the frame, using gridlines or your camera’s grid display.
- Use the reflecting pool as a leading line. The long water channel draws the eye straight toward the Taj Mahal. Include some of it in the foreground.
- Use the main pathway. Paths beside the pool create converging lines that reinforce symmetry.
- Keep vertical lines straight. If you tilt the camera upward, the minarets appear to lean inward. Step back, hold the camera level and crop later if needed.
- Frame it evenly. If you use trees or an arch as a frame, make sure they appear balanced on both sides.
Experiment With Different Angles
Once you have the classic centred photograph, don’t stop there. Take several compositions before you move on.
- Straight-on architectural shots: Your safe, symmetrical option.
- Slight side angles: A small step left or right adds depth and shows the monument’s volume.
- Low angles: Crouch near the water or garden edge to emphasise scale.
- Framing through arches: Use an archway or gateway as a natural frame.
- Garden perspectives: Add lawns, pathways or trees in the foreground.
- Close details: Switch to a tighter view of patterns and surfaces.
- Reflections: Look for calm water, but if it’s rippled, look for abstract shapes instead.
Photograph the Taj Mahal’s Architectural Details
Some of the most distinctive Taj Mahal pictures come from the small things:
- Marble inlay and floral motifs: Delicate stonework set into the white surface.
- Calligraphy: Bands of lettering around arched entrances make strong graphic compositions.
- Arched entrances: Strong shapes and shadows, especially from a slight angle.
- Minarets and dome details: Shoot the height against the sky, then the surface texture.
- Carved marble and geometric patterns: Look for repetition, then break it with a change in angle or light.
Shoot details at a slight angle rather than flat-on so texture shows. Side light makes carving and inlay stand out.
How to Take Better Taj Mahal Photos With a Smartphone
Use this checklist when you reach each viewpoint:
- Clean the lens. A quick wipe beats any setting.
- Turn on gridlines. They keep horizons and minarets straight.
- Avoid excessive digital zoom. Move closer or crop afterward.
- Tap to focus on the monument. This sets focus and exposure where it matters.
- Adjust exposure when the marble looks too bright. Slide it down until texture returns.
- Try both wide and standard lenses. Wide for context, standard for a natural look.
- Keep the phone steady. Hold it with both hands, elbows tucked in.
- Take both landscape and portrait photographs. Vertical frames suit the dome and minarets.
- Avoid overusing filters. They can change the marble’s colour and hide detail.
- Review the image before leaving a viewpoint. Zoom in to check focus and tilt.
How to Photograph the Taj Mahal in Different Light
The monument looks different as the day moves on, and your technique should change with it.
Soft Morning Light
Early light is usually gentler, with lower contrast and softer shadows. That makes it easier to keep detail in both bright marble and darker areas, and it suits architectural details and balanced exposure.
Stronger Daylight
Brighter light is more demanding. The white marble can lose detail quickly, so:
- Watch the highlights on your screen or histogram.
- Reduce exposure slightly if surfaces look blown out.
- Look for architectural shadows that add shape to arches and walls.
- Use shaded viewpoints, such as arches and tree cover, to give yourself softer conditions.
Late-Afternoon Light
As the sun drops, light becomes warmer and shadows longer, bringing out texture on carved surfaces. It’s a good chance to experiment with side lighting, which shows relief that flat light hides.
Best Taj Mahal Photography Spots
Think in terms of viewpoints, and ask what each one is good for. These Taj Mahal photo spots each suit a different kind of picture:
| Location | Best For |
| Main entrance axis | Establishing wide shots and balanced framing |
| Reflecting pool | Symmetrical compositions and reflections |
| Garden pathways | Leading lines |
| Side viewpoints | Perspective and angled compositions |
| Arched galleries and gateways | Framing |
| Yamuna-facing viewpoints | Open sky and a sense of landscape |
| Mehtab Bagh | Wider environmental views |
Choose three or four and try more than one composition at each.
Photographing the Taj Mahal From Mehtab Bagh
Mehtab Bagh sits across the Yamuna River from the monument, so it offers a different kind of photograph. Rather than a close, symmetrical view, you get a broader scene.
- Wider compositions: The monument becomes part of the setting.
- Taj Mahal and Yamuna landscape: Include the river and sky.
- Longer focal lengths: A short telephoto compresses the scene and brings the monument closer.
- Layered foreground and background: Place plants or the riverbank in front to add depth.
Visitors particularly interested in early-morning photography can consider a Sunrise Taj Mahal And Agra Tour By Car, allowing them to reach Agra early and build their sightseeing around the morning light.
Taj Mahal Photography Tips for Couples and Portraits
Portraits at the Taj Mahal work best when the monument supports the people instead of competing with them.
- Position people away from the centre of the monument. Stand them slightly to one side so the dome stays visible.
- Use the architecture as a background. Step back and avoid blocking major elements such as the dome or minaret tips.
- Use portrait mode carefully. It can look good on faces, but check the edges around hair and clothing.
- Try candid walking photographs. Ask people to stroll along a pathway rather than pose.
- Frame with arches or pathways. These naturally draw attention to the people.
How to Photograph the Taj Mahal When It Is Crowded
You can’t control the crowds, but you can control how you shoot.
- Arrive with several compositions in mind. If one is blocked, switch to the next.
- Use architectural framing. Arches and doorways limit what appears in the frame.
- Shoot upward. The dome, minarets and sky keep people out of the frame.
- Use tighter crops. Details and partial views exclude the crowd.
- Wait for brief gaps. Crowds move in waves, so a few seconds of patience can help.
- Move a few steps if someone obstructs the main subject.
- Include visitors on purpose. A small figure near the monument shows scale.
Common Taj Mahal Photography Mistakes to Avoid
- Taking only one standard front-facing photograph. Add side angles and details.
- Overexposing the white marble. Check the highlights.
- Using too much digital zoom. Move closer or crop later.
- Ignoring architectural details.
- Cutting off minarets or the dome. Check the frame edges.
- Tilting the camera. Use gridlines.
- Overusing filters. Keep colours natural.
- Forgetting vertical compositions.
- Carrying unnecessary equipment.
- Spending the entire visit behind the camera. Pause and look around.
What Photography Equipment Should You Carry?
Keep it light. For most visitors, this is enough:
- A smartphone or camera
- An extra battery or power bank
- A memory card
- A wide-angle lens, if you use an interchangeable-lens camera
- A lens cloth
- A small camera bag
Rules on equipment can change, so check what is currently allowed before packing anything bulky.
Can You Take Professional Photos at the Taj Mahal?
It depends on what you mean by “professional.”
- Casual photography: Personal pictures on a phone or camera, the norm for visitors.
- Travel photography: More serious shooting for a blog, social media or portfolio, still subject to on-site rules.
- Professional or commercial photography: Paid work, advertising or commercial use may need permission.
Rules and permissions can change, so check the current monument rules before your visit rather than relying on older information. Photography inside the main mausoleum has generally not been allowed, so confirm the latest guidance on the day.
How to Plan Your Taj Mahal Visit Around Photography
Think of your visit as a short shot list. A simple sequence keeps you from rushing:
Arrival → establish a wide composition → symmetry shots → architectural details → alternative angles → people and portrait shots → final wide shot.
Start wide, move to symmetry shots while your energy is high, then work on details and angles before photographing your companions. Finish with one last wide shot, since the scene may look different by then.
If you are traveling from Delhi and want the flexibility to spend more time at selected photography viewpoints, a Taj Mahal Tour From Delhi By Car can be a practical option.
Taj Mahal Photography Checklist for First-Time Visitors
☐ Clean camera lens ☐ Carry a charged phone/camera ☐ Bring a power bank ☐ Start with a symmetrical composition ☐ Take both horizontal and vertical shots ☐ Photograph architectural details ☐ Try different angles ☐ Check exposure on white marble ☐ Capture people for scale ☐ Leave time to enjoy the monument without the camera
Frequently Asked Questions
What is the best camera setting for photographing the Taj Mahal?
There is no single setting, because it depends on the light and your equipment. On a phone, leave the camera on auto and adjust exposure down if the marble looks too bright. On a camera, aperture priority around f/8 with a low ISO is a reasonable starting point. Then check your highlights and adjust.
Can I take good Taj Mahal photos with a smartphone?
Yes. For casual travel photography, composition and light matter more than expensive equipment. A clean lens, gridlines, careful exposure and a few different angles will improve your results.
What is the best lens for Taj Mahal photography?
A wide-angle lens is the most useful for gardens and full views, and a standard zoom is a good all-rounder. A telephoto lens is best for details and for views from farther away, such as Mehtab Bagh.
Where can I get different views of the Taj Mahal?
Try the gardens and side pathways for perspective, arches and gateways for framing, and Mehtab Bagh for a wider view that includes the river and landscape.
How can I photograph the Taj Mahal without too many people in the frame?
You can’t guarantee an empty scene, but you can improve your odds. Use arches for framing, shoot upward, crop tighter, and wait for short gaps in the flow of visitors.
Getting to Agra for a Photography-Focused Taj Mahal Visit
Travelers based in Delhi can reach Agra in different ways, and your choice affects how much flexibility you have at the monument. Road travel can give you more control over timing and stops, while rail follows a fixed schedule.
Travelers who prefer a scheduled rail journey can consider a Taj Mahal Tour From Delhi by Superfast Train, which is designed to make a same-day Agra visit convenient.
Conclusion
Good Taj Mahal photographs depend more on composition, patience and an eye for light than on expensive equipment. Whether you’re using a phone or a camera, take your time with a few intentional compositions: a balanced symmetrical frame, an unusual angle, a close look at the details. Then put the camera away for a while. The monument is worth experiencing with your own eyes, and that quiet moment will stay with you longer than any single picture. These Taj Mahal photography tips will help, but the visit itself matters most.